
Imagine standing on your driveway, looking at your aging roof, and wondering if a metal roof is the right choice. You’ve heard about durability, energy efficiency, and low maintenance but the thought of installation feels intimidating.
Many homeowners hesitate because they worry about mistakes that could lead to leaks, misaligned panels, or costly repairs. Learning how to install metal roofing correctly is critical, not just for durability but for safety and long-term cost control.
Without proper knowledge, common errors like poor fastening, skipping underlayment, or ignoring thermal expansion can compromise your roof’s performance.
This article will guide you through the step-by-step process, from preparation and materials to professional best practices and maintenance tips.
By the end, you’ll understand how to approach a metal roofing project confidently, whether you’re DIY-curious or planning to hire experts, and know what it takes to achieve a weather-resistant, long-lasting roof.
What Makes Metal Roofing Installation Different
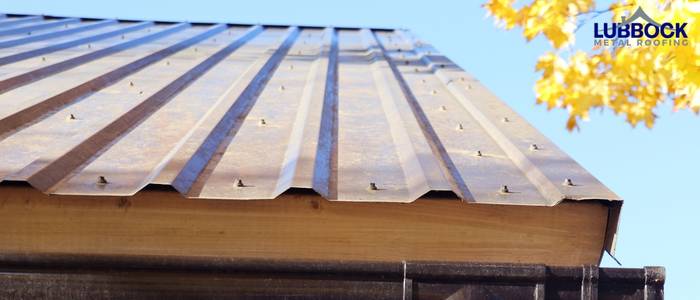
Metal roofing is not just another roofing material it behaves differently than shingles or tiles. Panels expand and contract with temperature changes, requiring careful alignment and precise fastening.
Proper underlayment and flashing are essential to prevent leaks, and every fastener must be installed at the correct torque to avoid panel distortion.
Unlike asphalt shingles, metal roofing demands attention to edges, ridges, and seams because small errors can create long-term issues.
This precision makes professional guidance or thorough preparation crucial. Understanding these differences is the first step in mastering how to install metal roofing, ensuring the finished roof is not only attractive but also resilient against storms, heat, and moisture over decades.
Early Installation Mistakes That Lead to Roof Failure
- Incorrect panel alignment – panels out of line cause gaps and stress.
- Poor fastening techniques – loose or over-tightened screws lead to leaks.
- Skipping underlayment preparation – exposes roof deck to moisture damage.
- Inadequate flashing installation – water can seep through roof intersections.
- Ignoring thermal expansion gaps – panels buckle or warp in hot/cold cycles.
- Improper edge and ridge detailing – edges are vulnerable to wind uplift.
- Using incompatible materials – mismatched metals cause corrosion or failure.
Even minor mistakes during installation can significantly reduce your roof’s lifespan, making awareness and careful execution essential for success.
Common Causes of Metal Roofing Installation Issues
| Installation Issue | Why It Happens |
|---|---|
| Weather exposure during install | Working without proper scheduling |
| Poor material selection | Choosing the wrong metal type or gauge |
| Lack of installation experience | Inadequate training or shortcuts |
| Structural or ventilation problems | Failure to assess roof deck conditions |
Understanding these causes helps homeowners and contractors prevent common pitfalls. Proper planning, material choice, and experience directly influence long-term performance and how to install metal roofing successfully.
Metal Roofing Types and Installation Techniques
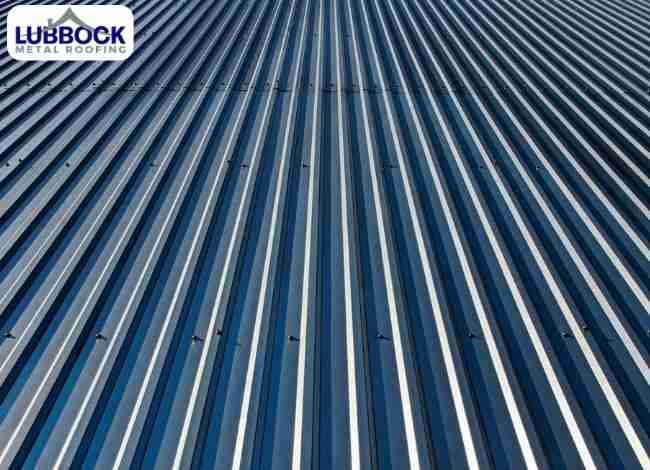
Metal roofs typically come in standing seam and exposed fastener systems. Standing seam panels offer a sleek appearance with concealed fasteners, reducing leak risk, while exposed fastener systems are easier to install but require careful sealing to prevent corrosion.
Panel choice affects installation steps, including cutting, fastening, and joining panels. Some metals expand more than others, making thermal gaps essential.
Selecting the right system before installation is critical; the wrong panel type can complicate alignment and flashing, increasing the likelihood of problems.
By understanding these differences, you can plan the workflow, anticipate material needs, and follow correct fastening and sealing methods, ensuring a durable, long-lasting roof.
Step-by-Step Metal Roofing Installation Workflow
- Roof inspection and surface preparation – remove old materials and check structural integrity.
- Installing moisture barriers and underlayment – essential for water protection.
- Measuring and laying out metal panels – maintain proper alignment and expansion gaps.
- Securing panels with correct fasteners – torque screws properly for durability.
- Installing flashing around penetrations – chimneys, vents, and skylights need sealing.
- Adding ridge caps and edge trims – completes the roof and prevents uplift.
- Final alignment check and weather sealing – ensure panels are straight and all fasteners tight.
Following these steps carefully ensures that your metal roof performs optimally and minimizes costly repairs later.
Why Professional Installation Matters for Metal Roofing
Precision reduces long-term repair needs. Metal roofing panels require exact alignment and fastener placement to resist wind and water intrusion.
Proper fastening extends roof lifespan, preventing screws from loosening or panels from buckling. Installing according to manufacturer specifications is crucial; deviation can void warranties.
Professionals bring experience with underlayment, flashing, and panel handling that homeowners often lack, avoiding common errors like misaligned seams or thermal expansion issues.
Warranty protection depends on correct installation, and experts ensure compliance with building codes and safety standards.
Additionally, professionals help prevent hidden damage to roof decks or insulation during installation.
While DIY installation might save upfront costs, investing in professional expertise ensures your metal roof delivers decades of reliability, energy efficiency, and peace of mind. Knowing how to install metal roofing with guidance from trained installers is a smart, long-term strategy.
DIY Metal Roofing Installation vs Hiring Experts
DIY Installation:
- Lower upfront cost
- Requires specialized tools and skills
- Higher risk of leaks and alignment issues
- No workmanship warranty
Professional Installation:
- Higher initial investment
- Faster and safer installation
- Manufacturer-approved methods
- Long-term performance assurance
Choosing between DIY and professionals depends on your confidence, experience, and willingness to invest in tools.
While some homeowners attempt how to install metal roofing themselves, hiring experts often saves time, prevents mistakes, and ensures warranty compliance.
Cost Factors That Affect Metal Roofing Installation
| Cost Factor | Installation Impact |
|---|---|
| Roof size and slope | Influences labor time |
| Metal type and thickness | Affects handling and fastening |
| Panel system selection | Changes installation complexity |
| Deck preparation needs | Adds repair labor |
| Safety equipment requirements | Impacts total project scope |
| Permit and code compliance | May increase project cost |
Understanding these factors helps homeowners plan budgets realistically. Proper planning avoids surprises and ensures your investment in how to install metal roofing is efficient and effective.
How to Select the Right Installer for Metal Roofing
Look for installers with metal roofing–specific experience rather than general roofing. Verify certifications, insurance, and ask for references from past projects.
Review warranties offered and ensure they cover both materials and installation. Clear communication, a detailed timeline, and transparent pricing are essential.
A professional who understands the nuances of standing seam and exposed fastener systems can prevent alignment, flashing, and expansion errors.
Checking these credentials ensures your roof is installed correctly, maintains durability, and meets all building code requirements.
Choosing the right installer is as important as learning how to install metal roofing, because expertise translates to a roof that lasts decades.
Post-Installation Maintenance Tips for Metal Roof Longevity
- Inspect fasteners periodically – tighten or replace any loose screws.
- Keep debris and moisture buildup away – leaves and water can cause corrosion.
- Check flashing and sealants annually – repair cracks or gaps promptly.
- Clean panels to prevent corrosion – mild soap and water are sufficient.
- Monitor expansion joints and movement – ensure panels are shifting properly.
- Address minor issues early – small problems prevent costly repairs.
Routine maintenance complements proper installation and ensures your metal roof remains strong, functional, and weather-resistant for decades.
FAQ
Which type of metal roof is best?
Aluminum is the most popular choice for corrugated metal roofing because it is more affordable than steel or copper.
While steel and copper are stronger metals, the corrugated design adds extra strength to aluminum sheets, making them durable, long-lasting, and cost-effective.
This combination of affordability, strength, and longevity makes aluminum corrugated roofing a smart choice for many homeowners.
What type of metal roof lasts the longest?
Copper roofing is one of the most durable metal roofing options, with a lifespan of 50–100 years or more when properly maintained.
Some copper roofs installed in the 1800s are still in excellent condition today, showcasing its exceptional longevity and resistance to corrosion over time.
What is required under metal roofing?
Under a metal roof, proper installation requires a few key components to ensure durability and performance:
- Underlayment: A water-resistant or synthetic layer that protects the roof deck from moisture.
- Fasteners and Clips: Designed specifically for metal panels to allow for expansion and prevent leaks.
- Flashing: Metal pieces installed around roof edges, vents, and chimneys to direct water away.
- Ventilation: Proper airflow beneath the roof to prevent condensation and prolong roof life.
These elements work together to protect your home and maximize the lifespan of a metal roof.
How many layers does a metal roof have?
If you could cut through a residential metal roof, you would typically see at least six layers. Starting from the bottom: the roof deck, made of your house’s rafters and sheathing, forms the foundation.
Above that, layers may include a vapor barrier, insulation, underlayment, the metal panels themselves, and finally a protective coating or finish. These layers work together to ensure durability, energy efficiency, and weather protection.
Conclusion
Mastering how to install metal roofing is more than a DIY challenge it’s a foundation for long-lasting performance, safety, and cost control.
Proper preparation, material selection, and attention to installation steps from underlayment and panel alignment to flashing and edge detailing determine how well your roof will withstand weather and temperature changes.
Engaging professional installers can further protect your investment, ensuring correct techniques, compliance with manufacturer guidelines, and peace of mind.
Post-installation maintenance is equally important to preserve durability and prevent minor issues from escalating.
Understanding these steps and best practices empowers homeowners to make informed decisions, whether tackling parts of the project themselves or supervising experts. A correctly installed metal roof is a lasting, resilient asset that enhances both safety and property value.
Have you considered how your approach to installation could impact the roof’s performance decades from now?